立体物の作成とレンダリングは、POV-RAYを使うのが最も簡単と思われる。
それには、POV-RAYのInsert Menuを使えるようにしておくことが肝心である。
POV-RAY:
http://www.povray.org/download/
Insert Menu:
http://www.f-lohmueller.de/pov_tut/down/insert_a.htm
Basic_Templates:
http://www.f-lohmueller.de/pov_tut/addon/00_Basic_Templates/_index.htm
これらの使い方、解説は数多くWebに載っている。
これらが、使えれば好きな立体物を作ってそれに貼り付けて楽しむことができる。
ちなみに、Insert Menuは、通常¥マイドキュメント¥POV-Ray¥v.3.6またはv3.7のフォルダー内に形成される。
サンプル作成方法:
1.貼り付けるSterling2の画像2枚を1つのフォルダーを作って入れる。
001.png(Parameter file : 001.loo )

001_7.png(Parameter file : 001_7.loo)

2.POV-RAYの「Insert」から「Ready_made_scenes\Basic_Scene_01-Checkered plane」を選択する。
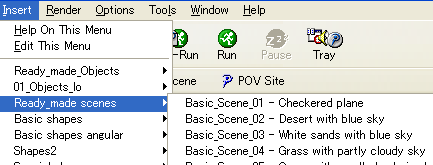
今回は、煩雑さを避けるためにチェッカーフロアー(// ground ----- plane{ <0,1,0>, 0 ・・・・)を削除し、トーラス「Insert¥Basic_shapes\torus」を追加した。


下記に、Parameter file : 001.loo、Parameter file : 001_7.loo、Program file : wrap.pov を添付する。
